Jane's blog banner

Tag: Jane Houston Jones

  • Chasing Galileo – Jupiter and the four Galilean satellites

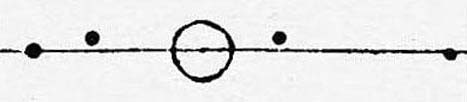
    Galileo's drawing
    Galileo’s drawing
    my drawing
    my drawing
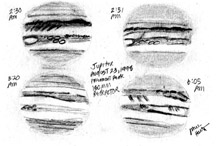
    my sketch of Jupiter's rotation
    my sketch of Jupiter’s rotation

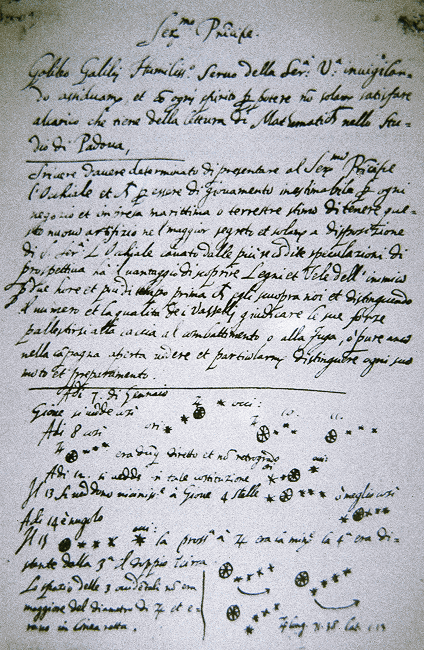
    Galileo published his observations in Sidereus Nuncius in March 1610: “On the 7th day of January in the present year, 1610, in the first hour of the following night, when I was viewing the constellations of the heavons through a telescope, the planet Jupiter presented itself to my view, and as I had prepared for myself a very excellent instrument, I noticed a circumstance which I had never been able to notice before, namely that three little stars, small but very bright, were near the planet…When on January 8th, led by some fatality, I turned again to look at the same part of the heavens, I found a very different state of things, for there were three little stars all west of Jupiter, and nearer together than on the previous night.”

    “I therefore concluded, and decided unhesitatingly, that there are three stars in the heavens moving about Jupiter, as Venus and Mercury around the Sun; which was at length established as clear as daylight by numerous other subsequent observations. These observations also established that there are not only three, but four, erratic sidereal bodies performing their revolutions around Jupiter.”

    Every amateur or accidental astronomer who first views Jupiter and its lineup of moons, is amazed at the view. Galileo’s 1610 discovery of these four moons orbiting Jupiter changed history. Looking at the Jovian moons through a small telescope, while trying to imagine Galileo’s first observations, takes my breath away!

    A page from Sidereus Nuncius: 1610

    First page of my observing log: 1989

    My first sketches of the rotation of the four Galilean satellites: 1989

  • Chasing Galileo – sketches of the nine-day moon

    nine-day moon
    nine-day moon

    Lunar creature features
    Lunar creature features

    Rabbit on the full moon
    Rabbit on the full moon

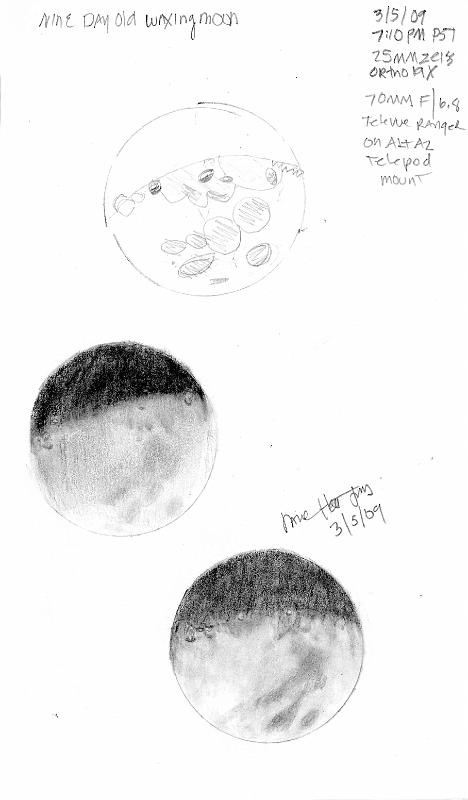
    Night owls can enjoy the nine-day moon – it’s up all night long. In my sketch, the magnificent crater Copernicus is visible on the sunlit side of the terminator – on the right side of the lunar center. It looks so insignificant right now, but at full moon, its spendid ray system is a naked-eye delight! Tonight you see the deep crater floor half lit by the sun. Here’s a closeup of Copernicus sketched through a larger telescope at higher magnification (185x versus 19x on these full disk drawings) on nearly the same day of the lunar month.

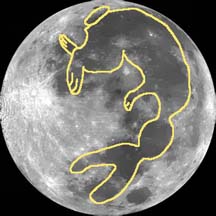
    From now until full moon, the dark lunar mare start to resemble creature features. I see half of the rabbit on the moon in my sketch. Mare Fecundatis and Mare Nectaris make the ears and Mare Tranquillatis (the Sea of Tranqulilty) makes a cute little bunny head. You can see other creatures in my February 2009 What’s Up podcast about the moon, linked below.

    As we near the full moon, the sun angle is more direct and crater wall shadows disappear. There are some other craters on the terminator tonight, which will reveal their amazing ejecta rays in a few more days when the moon is full. Towards the left edge of the terminator, Tycho is half lit now, but at full moon, its rays extend 1000 km. The spectacular walled plain Clavius is just starting to reveal its beauty. Through a telescope, when the entire crater is visible, you’ll see a dozen smaller craters on its floor.

    My What’s Up Podcast, July 2007: The phases of the moon

    My What’s Up Podcast, February 2009: Galileo’s and other first views of the moon through a telescope

    My photo of the nine-day moon

  • Chasing Galileo – sketches of the five-six day moon

    Five-day old waxing moon
    Six-day old waxing moon

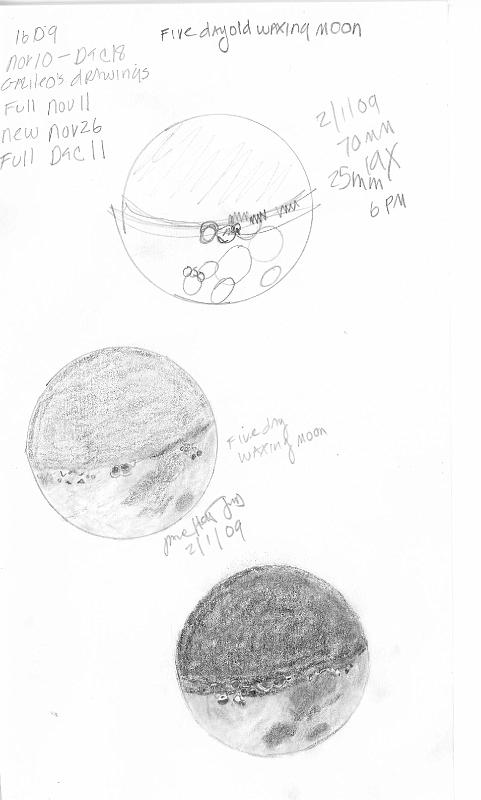
    The six-day waxing gibbous moon is visible for many hours in the evening – perfect for lunar observing and sketching. The time of my sketch was closer to the sixth day than the five day old moon. I had a hard time identifying craters using either lunar days! Note how much fainter Mare Crisium is now than on the three-day moon. Many of the features barely visible three lunar days earlier in earthshine are now lit.

    On the terminator, beginning on the right and moving to the left, I see Aristoteles and Eudoxus and sketched them as dark splotches. Montes Caucasus, the Caucasus Mountains, show as a half-circle of sunlit peaks on the terminator, cradling the Sea of Serenity. Hmmm, should I use the Latin names or the English names? A bit of both, so the more familiar names are understandable, I think. Closer to the center of the terminator, I can see Plinius, a bright white crater within the Sea of Tranquility. The Apollo 11 landing site, though not visible is just on the left edge of the Sea of Tranquility, the left-most of the two large seas touching the terminator. The large sea closer to the lower edge is Mare Fecundidatis, the Sea of Fertility.

    Moving back up to the lunar terminator are a pair of lit craters. They are Hipparchus and the small crater Horrocks (connected at right) and Albategnius. These are the two craters where the sunrise is just touching the crater walls a little more than halfway from the middle of the terminator.

    Moving along the terminator, the final 2 features I can identify (at 19x) are Gemma Frisius and Maurolycus, the last two craters on the sunlit side of the terminator on the left. I suspect the sunlit crater walls just on the unlit side of the terminator belong to the craters Walter and Purbach (to the right).

    Hitchhikers’s Guide to the moon. Select Feb. 1 or 2, 2009 to match my sketches.

    My photo of the five-six day moon

  • Chasing Galileo – sketches of the 3-day moon

    three-day old waxing moon
    three-day old waxing moon

    This year, my observing project is to recreate as many of Galileo’s original telescopic observations as I can. I’ll be using my smallest telescope, a 70mm refractor, and making my sketches using a 25mm eyepiece for a magnification of 19x. Each of my lunar sketch pages will each show three sketches on the page. My first sketch is an “outline” of major features. The second sketch shows more detail, and the third is the final sketch. When I’ve matched all of Galileo’s lunar sketches, I’ll make a comparison montage.

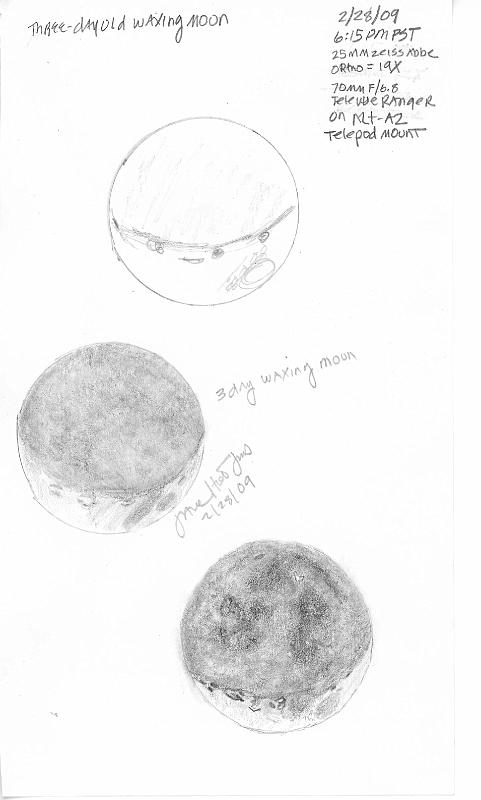
    The three-day waxing gibbous moon is high enough above the western horizon and far enough away from the setting sun to be easily visible. Earthshine illuminates the unlit features, and sun shines on the narrow crescent. Mare Crisium (the Sea of Crisis) is the oval dark geological feature visible on the lower right edge of the three-day-old crescent moon.

    The crater Picard can be seen within the smooth surface of Mare Crisium. Along the terminator are some distinctive craters and other features, visible even at 19x. Following the terminator from right to left in my sketch, are dark Mare Fecunditatis and the large oval craters Langrenus, Vendelinus, and Petavius, all partially lit by the sunrise on their walls.

    Petavius, the third of the 4 evenly spaced, and similarly sized craters shows some of the prominent crater floor structure of central peak and rimae – which I sketched as a dark angluar line. Funerius, fourth and last of the big craters on the terminator tonight, are near the two smaller craters, Snellius and Stevenius. In my sketch, I just show the crater floors flooded with shadow.

    Earthshine reveals Mare Imbrium and Mare Serenitatis, Nubium and Humorum. And I was able to see the crater Aristarchus (the white feature top middle of the earthshine) and Plinius and Linne — the small white features in the lower middle of earthshine.

    Use the link below to Hitchhikers Guide to the Moon to identify other features.

    Hitchhikers Guide to the Moon

    Sketch of Petavius

    Sketch of Langrenus, Vandelinus, Petavius, and Furnerius a few days after full moon February 3, 2007, a 16 day-old waning moon.

    My photo of the 3-day moon

  • Chasing Galileo – sunspots

    Galileo's sunspots
    Galileo's sunspots
    My sunspots
    My sunspots

    In the summer of 1612, Galileo sketched a series of sunspots which were published in Istoria e Dimostrazioni Intorno Alle Macchie Solari e Loro Accidenti Rome, (History and Demonstrations Concerning Sunspots and their Properties), in 1613. Galileo corresponded with other scientists and artists who also were sketching the sun in the early 1600’s. He used a 16mm, f/11 Galilean refractor, and many drawings are known to have survived. He observed the sun using attenuated eyepiece (attenuated by Earth’s atmosphere when the Sun was low on the horizon at dusk) and eyepiece projection techniques.

    A lot of people repeat the story (which is really just an urban legend) that Galileo became blind by looking at the Sun through his telescope. He went blind in 1672, from a combination of cataracts and glaucoma more than half a century after publishing his sunspot sketches.

    In his sunspot letters to Mark Welser, dated May 4, 1612, Galileo mentions observing the Sun directly — but only at sunset. In its final paragraph, he mentions that his pupil Benedetto Castelli has discovered a better way to observe – using a projection method.

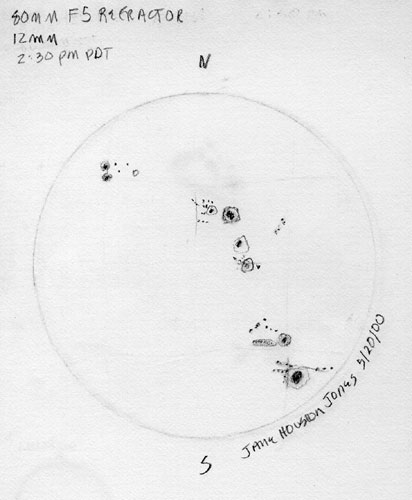
    My sunspot drawings were made mostly in 2002, near solar maximum, so I was able to see and sketch and classify hundreds of sunspots and other solar features. The one pictured here was made a few years earlier, tho’. I used three telescopes for my observations, a homemade bright yellow 6-inch f/10 Dobsonian reflector which I made in John Dobson’s telescope making class, an Orion 80mm refractor with a white-light solar filter and a Televue 70mm Ranger refractor with a Coronado h-alpha filter. I used these instruments to make daily sketches over two solar rotations (about 2 months) and completed the Astronomical League’s Sunspotter Club observing program. My 2002 solar sketches are linked below.

    Some Solar links:

    Historical Sunspot Drawing Resource Page

    My whole disk, sunspot and h-alpha drawings of the Sun

    A solar sidewalk astronomy article I wrote for the SOHO mission website

    My What’s Up podcast for May 2009 is all about the Sun

  • Chasing Galileo: the Trapezium

    Galileo's Trapezium
    Galileo’s Trapezium
    Jane's Trapezium sketches
    My Trapezium sketches

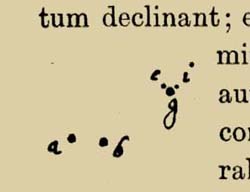
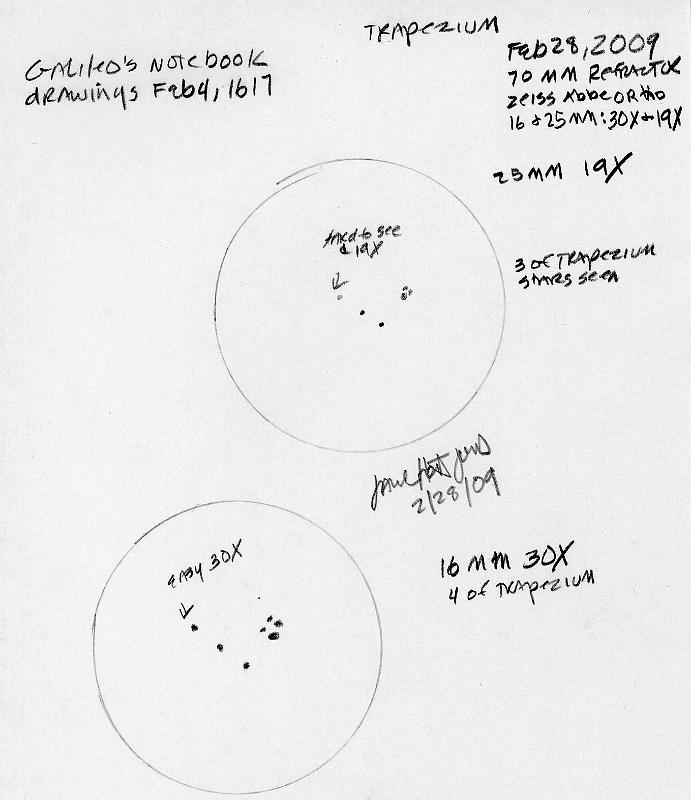
    Galileo’s observed the Trapezium stars in the sword of Orion on February 4, 1617. He labeled the three stars “c”, “g”, and “i”. These stars are known now as the “D”, “C” and “A” components of Theta 1 Orionis, or 41 Orionis. He did not see the fainter “B” component.

    Galileo’s text states that the apparent spacing of stars “a” and “g”, as seen through his telescope, exactly matched the apparent spacing of two of the stars in Orion’s belt as seen with the unaided eye. This implies a power of 27 for his telescope.

    This observing report from Galileo’s notebook is translated from the Latin: “The arrangement of fixed stars pictured here was discovered by me near the point of Orion’s sword, from which they arise toward the north and lean a bit to the east; and g and b appear equal in magnitude, a smaller really by little, but two, c, i, rather faint, scarcely a fourth or fifth part of g itself. Three, a, b, g, form a very obtuse angle. The lines through b, a, and through i, c, are almost parallel, but will [eventually] meet [in a direction] towards c, a. Two, c, i, are equidistant from g, which they practically touch. The distance between a and b is adjudged three semidiameters of Jupiter, to which the distance b-g seems triple. These things were observed by me the fourth day of February 1617 at Bellosguardo.”

    I sketched the Trapezium using my 70mm Televue Ranger and two eyepieces — my 25mm Zeiss Abbe for a 19x and 16mm Zeiss Abbe for 30x magnified view. At 19x I had difficulty seeing the B or faintest component of the trapezium stars. But when I upped the magnification to 30x I could see all four stars easily.

    Here is an astrophoto of M42, the Orion nebula, showing the Trapezium stars. It was taken by my hubby Morris Jones.

    Here is Charles Messier’s sketch of M42 and the Trapezium stars

    Here is a huge list of links, references and additional information about Galileo’s observations.

  • Chasing Galileo: the Pleiades

    Galileo's Pleaids
    Galileo’s Pleaids
    janepleiades32
    My sketch of the Pleiades

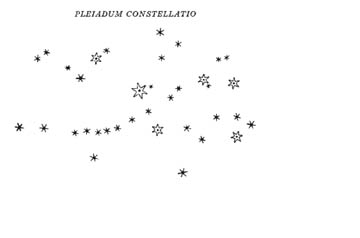
    Galileo’s sketch of the Pleiades was published in Sidereus Nuncius in 1610.

    Galileo identified four levels of stellar magnitude. He represented the six naked eye stars he could see with a large star symbol. These 6 stars were listed in Ptolemy’s Star Catalog. Next come seven stars represented by larger than average star symbols. Twenty-one average sized star symbols are the next magnitude and two smaller than average star symbols complete the sketch.  Galileo saw thirty-six stars in the Pleiades.

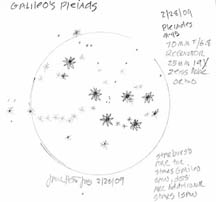
    My Pleiades sketch, using my Televue Ranger and a 25mm Zeiss Abbe Ortho eyepiece shows the Pleaides I was able to see at 19x. I saw the familiar 7 brightest members (the 7 sisters) and an additional 39 stars. I tried to make the size of each star sketch match the changes in magnitude, just like Galileo did.

    Several of Galileo’s hand drawn sketches of the Pleiades, along with a diagram of Cassiopea, can be found in Volume 3, page 962 of the National Edition of Galileo’s works and are linked below:

    Volume 3, page 962 of the National Edition of Galileo’s works

    A page from Sidereus Nuncius showing Galileo’s Pleiads

    Seven Sisters Overhead: Native American Legends of the Pleiades is an article I wrote for Fast Forward, a Marin County, CA Kids newspaper. It features a charming sketch of the Pleiades by my mom, Barbara Miller.

    Here is a wide field astrophoto of the Pleiades or M-45 taken by my hubby Morris Jones.

  • A day in the life of the moon

    This was one of the first astronomy articles I wrote. It was published in the Sidewalk Astronomers newsletter about 20 years ago. My mom, Barbara Miller drew the little lunar phases which accompanied the writeup. I’ve scanned the original article and it’s linked at the bottom of this blog page. Here’s my first article 🙂

    Fasten your seat belt because you are going on a guided tour of the moon. This little guide describes what lunar features can be seen during the different phases of the moon. Use this diary all year to sketch the moon each day, while observing the seas or plains, mountains, impact craters and shadows on the moon. You’ll be surprised at some of the familiar geology you’ll see on our rocky neighbor.

    New Moon Phase Day 1 – 6 “Rises at dawn, sets at dusk” New moon means the instant when the moon is visible in its conjunction with the Sun. This is the starting point of the lunation or period of the Moon’s cycle around the sky. Day 1 is very difficult to observe. On day 2, the “sea” of crises, Mare Crisium becomes visible. To the south is Petavius, a large crater with a central peak of over 8000 feet. Day 3 brings Mare Fecunditatis, south of Mare Crisium, into view. On day 4, Crisium and Mare Fecunditatis are fully visible, and the walled plain Janssen is visible. On day 5, Theophilus and Cyrillus make a nice pair of craters. The crater Maurolycus, with a central peak like Theophilus, appears on day 6. The moon is now approaching first quarter. The terminator — the boundary between the sunlit and dark parts of the moon — is now at the center of the moon’s disk.

    First Quarter Phase Day 7 – 13 “Rises at noon, sets at midnight” The crater Hipparchus is at its visible best near the terminator on day 7 as is the mountain Piton, with its prominent peak at the terminator tonight. Look for two craters within Hipparchus. Day 8 brings into view the rugged Appenine mountains, and to the north the oval walled plain Plato. With binoculars or telescopes, find the Straight Wall, a lunar fault line. Tycho and Copernicus are on the terminator on day 9, and so is Clavius, the large walled plain south of Tycho. On day 10 look for the Jura Mountains and Sinus Iridum, the bay of rainbows — a hooklike curved mountainous point on the edge of Mare Imbrium. This is one of my favorite objects on the moon to observe and sketch. On day 11 observe the lunar plains. On day 12, look at Gassendi, a large crater. As full moon approaches, look back over the objects you observed each night and see how different they look.

    Full Moon Phase Day 14 – 21 “Rises at dusk, sets at dawn” Look at the ray system tonight. The brightly illuminated moon washes out all other observing projects so you might as well enjoy the moon tonight. The rays of Tycho are the best! Day 15 brings sunset to Mare Crisium, 2 weeks after we first viewed its sunrise. Watch the shadows cast on the walls of the plains including darkened Mare Crisium on day 16 through 18. Day 19 is the best day to view the Sea of Tranquility, famous as the landing site of Apollo 11. Day 20 brings the terminator to another of my favorite observing and sketching sites, the three craters Theophilus, Catharina and Cyrillus. Mountains are the highlight of day 21. The Apennines, and the large craters Kepler, Copernicus and Tycho are beautiful at lunar sunset. The last quarter moon has arrived.

    Last Quarter Moon day 22 -27 “Rises at midnight, sets at noon” Dedication is required to complete the viewing of the lunar cycle. Mare Imbruim and Copernicus are darkening tonight, day 23. On day 24 through 27, most observers are sleeping when the moon is visible. Use binoculars to observe earthshine over the surface of the moon. These are the days (or rather nights) to turn your eyes, binoculars or telescopes to other wonders of the night sky: planets, comets, meteor showers and galaxies. Then, say good-night to our close neighbor, and with a sense of wonder and accomplishment, have a good sleep!

    APOLLO LANDING SITES ON THE MOON

    Have you ever been asked “Can you see where men landed on the moon”? Even with a small telescope, you can pinpoint some of the landing areas. I will describe how to “crater hop” to the sites below. I’ve linked to a great lunar landing site map below.

    Apollo 11 Find the crater Julius Caesar to the left of the Sea of Tranquility (Mare Tranquillitatis). Below and to the right are two unnamed craters joined to look like the number 8. Directly south are the twin craters Ritter and Sabine. Apollo 11 is about 3 Sabine sized crater widths to the right of Sabine. Three tiny craters above the site are named Aldrin, Collins and Armstrong after the Apollo 11 astronauts. The best days to look is about 5 or 6 days after the new moon or 4 or 5 days after the full moon.

    Apollo 12 landed in Mare Insularum, about two crater widths southeast of the crater Lansburg.

    Apollo 14 landed north of Fra Mauro, a ringed plain that sits at the boundary between Mare Insularum and Mare Cognitum. The best time to see this this plain is at the waxing gibbous or waning crescent phase on days 7-13 and 22-27.

    Apollo 15 Find the crater Archimedes to the left of the Appenine mountains. Between the crater and the mountains is a feature called Hadley Rille. When this area is in shadow, on day 20 or 21, you will see the undulating rilles. This rille is just west of the Apollo 15 landing site. To astronauts Dave Scott and Jim Irwin, this was a very steep climb on their exploration of the lunar surface.

    Apollo 16 landed in the Descartes highland. Look one crater width north of Descartes to find the site.

    Apollo 17 Find the eastern shore of Mare Serenitatis. The site of Apollo 17 lies between the craters Littrow and Mons Argaeus in the Taurus-Littrow Valley.

    There were 4 Apollo orbital test missions, 2 around the earth and 2 around the moon before the first moon landing with Apollo 11 on July 16th, 1969. There have been 18 men who went to the moon on the Apollo 11, 12, 14, 15, 16 and 17 missions, but none of them saw the full moon and full earth as depicted in the “Apollo 13” movie. We see a full moon when the Earth is between the sun and the moon. The lit side of the Earth will not be visible on the moon.

    My What’s Up podcast about the moon

    Map of lunar landing sites

    Sidewalk Astronomy moon writeup with my mom’s lunar phase drawings
  • Chasing Galileo – sketches of the moon

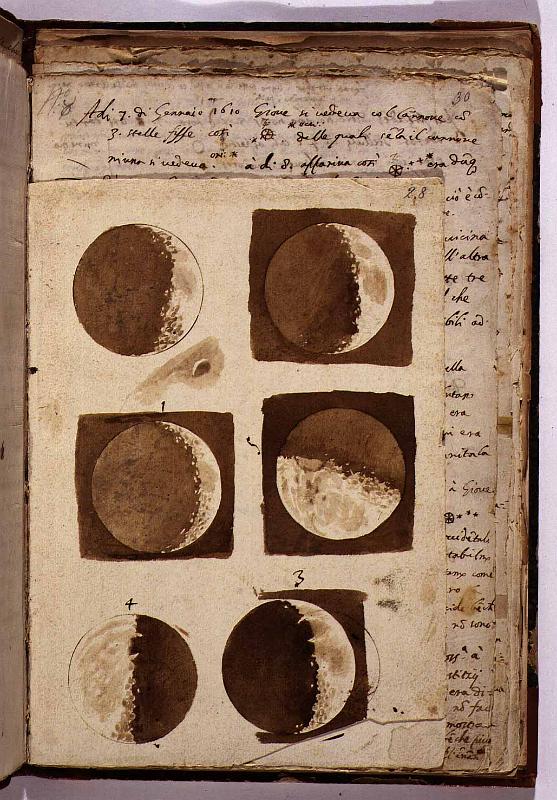
    Folio page 28 manuscript copy of Sidereus Nuncius
    Folio page 28 manuscript copy of Sidereus Nuncius
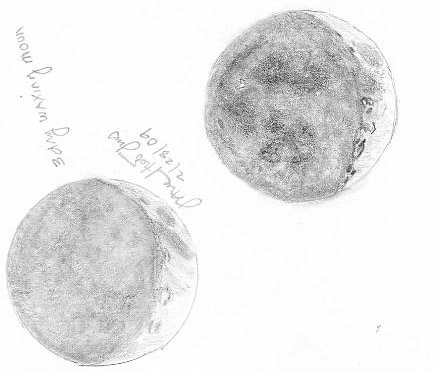
    sketch of 3-day old waxing moon 2-28-09
    sketch of 3-day old waxing moon 2-28-09
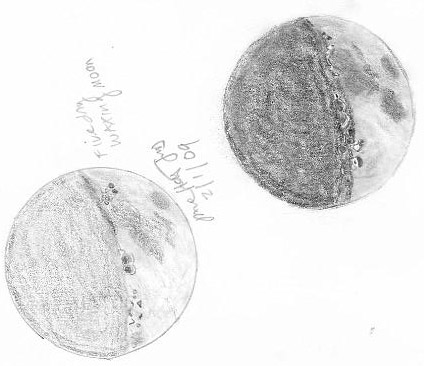
    sketch of 5-day old waxing moon
    sketch of 5-day old waxing moon
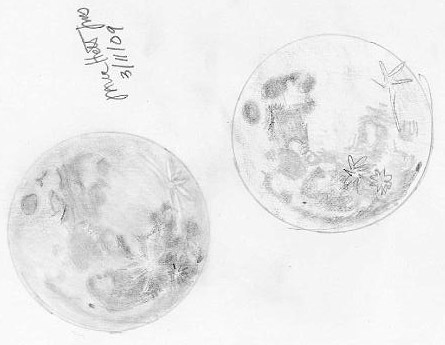
    sketch of 14-day (full) moon 3/11/09
    sketch of 14-day (full) moon 3/11/09

    Galileo’s watercolor drawings were made with brown ink wash on watercolor paper. To me, these are the most beautiful of Galileo’s astronomical renderings. When I look at the lunar terminator through my own telescopes, and hunt for interesting features to sketch, I sometime daydream, and try to imagine what Galileo thought as he surveyed these surprising lunar features. I feel a tingle every time I see the sunrise or the sunset illuminate a lunar crater floor, or escape through a crumbling wall to create a fleeting sun ray.

    I’ve been sketching the moon for about 20 years, but I’ve always focused on a small segment of the lunar terminator as my sketching target. I’d never tried to sketch the entire moon in one sitting before. Sketching the entire lunar disk is a daunting project. So I decided to make my sketches very small – three sketches to a page. I like to show my “rough sketch” first. It is sort of a outline of the major features. Then I create a finer sketch, filling in the details. Often, I make a third “final final” sketch, too.

    I used a 5″ x 8″ inch bound sketch book instead of my usual 3.5 x 5 inch 400 Series Strathmore spiral bound sketch pad. I always use my slender set of 12 mix and match Pitt pure graphite, Castell fine, and Wasserlack bold Faber-Castell graphite art set pencils. I like to keep the sketching process simple and uncluttered and the supplies compact. No table, no lights shining off my forehead, no messy products that would get on my Zeiss eyepieces or my fingers. Armed with these supplies, all I have to do is wait for the moon to become visible on a night of above-average seeing.

    Here is a partial collection of “cropped” lunar sketch pages made at the eyepiece of my 70mm Televue f/7.8 Ranger refractor. I haven’t completed my “Galileo-like” lunar sketches yet because I prefer to wait for those nights of exceptional seeing to sketch at the eyepiece, and I am in no hurry to finish this project. These crops don’t show the “rough” sketch, and are rotated to match Galileo’s brown ink wash paintings. There is one full sketch linked at the bottom of this article, and I’ll dedicate one future blog to each of the lunar sketches.

    I used one of the finest planetary eyepieces to complement my telescope — a 25mm Zeiss Abbe Orthoscopic. This gave me a 19x view of the lunar surface, similar to what you would see through a pair of binoculars, but also similar to the magnification (but not the same field of view) of Galileo’s telescope, which was 21x. Twentieth century Extra-Low Dispersion (“ED”) glass in the Televue Ranger and the exceptional quality of the Zeiss Abbe orthoscopic eyepieces plus a wider field of view give me quite an advantage, but that’s the telescope and eyepieces I have at my disposal. Lucky me!

    An example of my uncropped 3-to-a-page lunar sketches through a 70mm refractor

  • Chasing Galileo: sketches through a small refractor

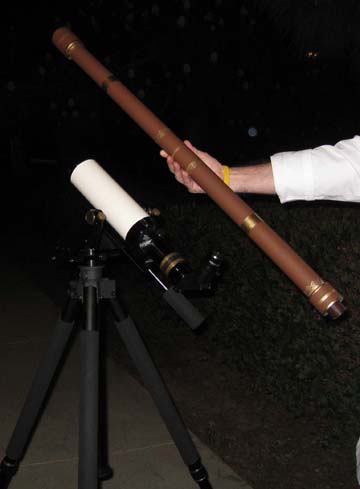
    Galileo replica and my TVRanger
    Galileo telescope replica and my TV Ranger
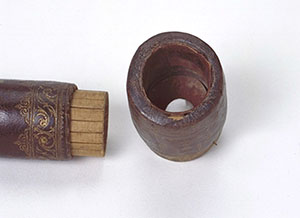
    Galileo's 1609 telescope
    Galileo's 1609 telescope
    There were separate housings at either end for the objective and the eyepiece
    There were separate housings at either end for the objective and the eyepiece

    When I started thinking about how to integrate International Year of Astronomy into my 2009 What’s Up podcasts I naturally focused on Galileo’s first observations through a telescope 400 years ago. Over the first months of 2009 I had collected a gallery of Galileo’s first sketches, watercolors and engravings. These historic observations suggested a project I’ve been wanting to do for some time — to recreate all of Galileo’s astronomical sketches through a similar sized instrument.

    Galileo made his first telescope, a spyglass that magnified 3x in June or July 1609. Next he made an eight-powered instrument and presented it to the Venetian Senate in August. His next telescope, which magnified twenty-one times is the one he used to observe the bumps and shadows on the moon, Jupiter and its moons, and individual stars within patchy nebulae. These first observations were unveiled to the world in his book, Sidereus Nuncius published in March 1610.

    Galileo’s telescope, pictured above has a objective diameter of 37 mm and a focal length of 980 mm. The instrument’s magnification is 21. My Televue Ranger (ED Doublet Apochromatic refractor) has an objective diameter of 70mm, a focal length of 480mm, and using a 25mm Zeiss Abbe Orthoscopic eyepiece, yields a comparable magnification of 19. The field of view, however is dramatically different between the two instruments. Galileo’s longer focal length and smaller objective (which he also stopped down to lessen chromatic aberation) give a relatively small field of view  – 15 degrees. My shorter focal length and larger aperture instrument has triple that FOV.

    What this means is that a telescopic view of Venus through both instruments will show the same size Venus, but in my ‘scope there will be more “sky” around Venus, and in Galileo’s there will be mostly Venus. A view of the moon is a different matter. Just a portion of the moon is visible at any one time through Galileo’s scope and the entire moon is visible through mine.

    Galileo’s drawings and watercolor paintings of the moon inspired me to sketch what I see through the eyepiece. I’ve been sketching since first light with my own first telescope over 20 years ago. This year, I’ll be honoring Galileo and celebrating the 400th anniversary of telescopic observations by creating 21st century sketches through a small refractor. I hope this journey back 400 years to revisit Galileo’s observations encourages you to look up. And I hope you’ll enjoy my sketches standing side-by-side with these historic first astronomical observations through a telescope!

    NPR story: Galileo’s Telescope Travels Far, Sees Farther

    Galileo’s telescope: specifications and images